You can film a usable YouTube video with a phone, a window, and a quiet room. Nothing here costs money. But the more useful answer to "how do I film with no budget" is that filming is probably not where your time should go at all — the setup below takes twenty minutes to sort out once, and the hours you save belong somewhere with a much bigger effect on whether the video gets watched.
Why filming is the wrong place to spend your no-budget hours
Discovery on YouTube runs on titles, thumbnails, descriptions and how well a video holds attention once clicked — not on how the shot was lit. If you read YouTube's own creator documentation on how videos get recommended and how search works, production polish never appears as a ranking input. What does appear, repeatedly, is whether a title and thumbnail accurately represent content people want to watch, and whether viewers keep watching once they click.
That means every hour spent rigging a three-point light or hunting for a cheap lav mic is an hour not spent on the two things actually under measurement: the packaging that earns the click, and the opening that earns the watch. A no-budget creator has a fixed number of hours in a week. Sinking three of them into lighting a decent-but-forgettable video, and twenty minutes into the title, is spending time exactly backwards.
This isn't an argument that quality doesn't matter — it's an argument about where the quality bar actually sits. A viewer will forgive flat lighting. They will not forgive a video that promised something the thumbnail and title didn't deliver, and they won't sit through thirty seconds of dead air waiting to find out if the video is any good. Filming needs to clear a minimum bar. Packaging needs to be genuinely good. Those are different amounts of effort, and most no-budget guides spend all their words on the one that needs less.
The zero-cost setup that clears the bar
The minimum viable setup is a phone camera, a window, and a room where you can hear yourself talk. That's it — you already own or have access to all three.
Camera: any smartphone from the last several years shoots resolution and detail well past what the platform needs for a talking-head or demo video. Shoot in landscape unless you're making a Short, keep the lens clean, and prop the phone at eye height or slightly above rather than looking up your nose. A stack of books works as a tripod.
Light: face a window, don't stand with your back to it. Daylight is free, even, and flatters skin tones better than most cheap ring lights. Overcast days give softer, more forgiving light than direct sun.
Audio: film somewhere quiet, close the door, and get within a couple of feet of the phone mic. That's the whole spec. The next section covers how to actually hit it.
Framing: fill the frame with yourself rather than sitting in the middle of a wide, empty room. Headroom shouldn't be excessive. That's a two-minute adjustment, not a production skill.
None of this requires buying anything, and none of it requires a plan more sophisticated than "face the window, get close to the mic, keep the frame clean."
Getting audio and light right without spending anything
Audio problems cost more attention than lighting problems, so get the mic distance right first: the built-in phone mic works fine within two to three feet, and every extra foot past that adds room noise and hiss you'll notice on playback even if you didn't notice it while filming. If the room echoes, that's usually a hard-surfaced space — a closet full of clothes, a room with curtains and a rug, or a couch cushion set up near the phone will absorb the reflections that make speech sound distant or tinny. You don't need acoustic foam, you need soft stuff between you and bare walls.
For light, position yourself so the window is in front of you or at a 45-degree angle, never behind you — backlighting turns you into a silhouette, which is the single biggest lighting mistake and the easiest to avoid for free. If the light from one side is too harsh, a white sheet, a piece of paper, or even a wall can bounce fill light back into the shadow side of your face. Midday direct sun through a window is usually too harsh and contrasty; moving to a different window or waiting an hour often fixes it without any equipment at all.
Test both before you commit to a full take: record ten seconds, play it back with headphones, and check the shadows on your face. That's the entire quality-control process, and it takes less time than adjusting a single light stand.
What actually tanks a no-budget video (and what doesn't)
Two failures cost you viewers: audio you have to strain to hear, and a frame so dark you can't see what's happening. Both are comprehension problems, not aesthetic ones — a viewer who can't make out the words or the image leaves, regardless of how good the content is. The opening seconds having no hook is the third real failure, and it's not a filming problem at all — it's a scripting and structure one, but it shows up on the same footage and gets blamed on the camera anyway.
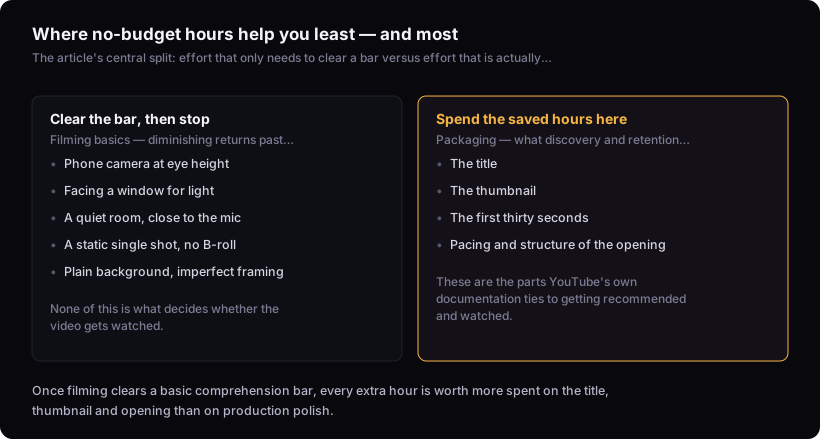
What doesn't cost you views: the absence of B-roll, a static single shot with no camera movement, a plain background, or slightly imperfect framing. A locked-off phone on a stack of books, one continuous take, no cutaways — that's a completely viable format if the pacing holds and the opening earns attention. Plenty of long-running formats are exactly this: one person, one static shot, one microphone. The camera work isn't carrying the video; the talking and the structure are. If your pacing drags or your opening has no hook, moving the camera around won't fix it, and if your pacing is tight, a static shot won't hurt it.
The practical filter is simple: fix anything that stops a viewer from hearing or seeing what's happening. Ignore anything that's purely about polish once that bar is cleared.
Where to put the time you just saved
The hours you didn't spend lighting a set are worth more spent on the parts of the video that actually get measured: the title, the thumbnail, and the first thirty seconds.
Start with the title, since it's usually the fastest fix and it's what a viewer sees before anything else — how to write youtube titles that get clicks covers the shapes that tend to hold up against vague or overstuffed phrasing. Pair that with the thumbnail, since the two are read together in the feed before a click ever happens — how to make a youtube thumbnail that gets clicks walks through what a thumbnail needs to communicate in the very short window it actually gets.
Once someone clicks, the opening is what decides whether they stay, and it's worth more rehearsal time than any lighting adjustment — see how to hook viewers in the first 30 seconds for the mechanics of that. If you want to see whether your packaging or your retention is the weaker link on past videos, youtube impressions vs views: what the pair actually tells you and how to read your youtube retention graph both give you a way to check rather than guess.
What this article doesn't cover
This is a filming-setup guide only. It doesn't cover editing, what to upgrade once you do have a budget, or on-camera delivery and performance — those are separate skills with their own methods. It also can't tell you whether your specific niche expects higher production value than average; that varies by content type in ways YouTube's documentation doesn't quantify, and a format that gets away with a phone and a window in one niche might genuinely need more in another. If you're unsure where your channel sits, the retention data on your own past videos is a better guide than a general rule.
Before you publish the next one, run through what to check before publishing a youtube video — it's a faster way to catch a weak title or thumbnail than any amount of re-shooting.